One or two Grounded Grid Preamps

the thermionic watercooler

One or two Grounded Grid Preamps

Postby soundbrigade » Fri Sep 18, 2009 8:10 am

I am slightly fedup and tired of all this nagging about my unpublishe GG-amps ;) , so I'd better start a thread about those. Maybe I forget to finish them.
THEM (???) , they are two - call os legio, because we are two ...

Well, this is the story, shortly. Some years ago I built a simple STC (http://www.gem.hi-ho.ne.jp/katsu-san/audio/what_STC1_english.html) amp to a guy who wanted a small bedroom amp of 2-3W. After a while he asked me to if I could get together a tube preamp with a remote control. Do you know what the stupid person (me) does??? =:o He says YES, NO PROBLEMAS!!!
So I started off with no clue how to satisfy this guy but I came to think of Rozenblit's GG-amp and obtained his book Audio Reality and started to look for components. I also came upon a webshop in HongKong (http://diyclub.biz/catalog/index.php?cPath=1) that had a cheap remote controlled volume potentiometer. We had some discussions where and how to house the amplifier, and we found a nice box in Italy.
My friend made a new and thicker front plate with holes that would show the tubes. And I started (but just started) assembling the amp.
After 2 years I am still not finished and I have also started with a new one, assebmbled on a PCB bought from a company in China (http://www.analogmetric.com/).
This thread will describe the long and winding path with GG #1 and hopefully a description of #2. The second amp (the kit), I will keep.
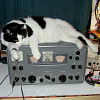
So here comes the photos. (net)
Magnus

"It is always more difficult to fight against faith than against knowledge."
User avatar
soundbrigade
KT88
 
Posts: 1760
Joined: Mon Jan 28, 2008 4:57 am
Location: Little Paris, Sweden

Postby soundbrigade » Fri Sep 18, 2009 8:25 am

As I wrote, this one has been on the way for a very long time, so long that I certainly have lost components and worse, have forgotten what I did last time (a year ago). (???)
The idea was to build a smart preamp with a remote control, housed in a normal box.
This shows some of the details and the general layout. The red PCB with the caterpillar is the RTR volume controller. It also hooks up to the relayboard in the back - 3 pairs of inputs. The transformer is a special made one from Germany. To the right is the PSU; that board will house a smallish 12V-transformer fro the controller. The tree tubes will be positioned close to the front panel. This was the first obstacle, how to position the tubes this way and have some space left for the potentiometer board?
Image

The back plane shows the in- and outputs (connectors are from http://www.vt4c.com, as we say in Sweden, they are very good and snot cheap).
Image

The frontplate with the holes and knob. The three small holes below the know will house blue LEDs that will show what inputs is "in".
Image

Transformers and the PSU. I hope the Cu-shield will fence off some gastroclinical interferences from the transformer. A toroid or R-core whould possible ben a better choice.
http://www.pastisch.se/tubes/images/gg-06.jpg
Magnus

"It is always more difficult to fight against faith than against knowledge."
User avatar
soundbrigade
KT88
 
Posts: 1760
Joined: Mon Jan 28, 2008 4:57 am
Location: Little Paris, Sweden

Postby soundbrigade » Fri Sep 18, 2009 8:29 am

An idea ... :/ ...
Image

Yepp, this will work!! :))
Image

It is crammed down there.
Image

The end result will be something like this.
Image

The tubes are mounted on a narrow strip of aluminium (needs some kind of support (???) ). Only two are visible through the front panel.
Image

And finally - how to mount the thicker aluminum front to the chassis? Glue???
Image
Magnus

"It is always more difficult to fight against faith than against knowledge."
User avatar
soundbrigade
KT88
 
Posts: 1760
Joined: Mon Jan 28, 2008 4:57 am
Location: Little Paris, Sweden

Postby Geek » Fri Sep 18, 2009 1:54 pm

Looks great!

How thick is that faceplate? If pretty thick, you could partially drill and tap and hold it on with screws from the rear.

Is there a schematic for the pre?

Cheers!
-= Gregg =-
Fine wine comes in glass bottles, not plastic sacks. Therefore the finer electrons are also found in glass bottles.
User avatar
Geek
KT88
 
Posts: 3585
Joined: Sun Oct 21, 2007 3:01 am
Location: Chilliwack, British Columbia

Postby soundbrigade » Fri Sep 18, 2009 2:06 pm

I think it is 8mm, so it could work by drilling and tap it. I let the guy who ordered it decide.

Schematic .. well in the Rozenblit book.
Magnus

"It is always more difficult to fight against faith than against knowledge."
User avatar
soundbrigade
KT88
 
Posts: 1760
Joined: Mon Jan 28, 2008 4:57 am
Location: Little Paris, Sweden

Postby soundbrigade » Sat Sep 19, 2009 6:29 am

While I am idling (again) I can show you some pics of the second Grounded Grid amp, the one with PCBs from China.

It looks like heavy duty.
Image

Fully populated
Image

Not fully populated, but with tubes. My sockets weren't of the correct type, so I had to fiddle a little bit.
Image

Almost there. No I miss EVERYTHING else. $). Either I build a suitable box myself, or I order something from Italy.
Image
Magnus

"It is always more difficult to fight against faith than against knowledge."
User avatar
soundbrigade
KT88
 
Posts: 1760
Joined: Mon Jan 28, 2008 4:57 am
Location: Little Paris, Sweden

Postby soundbrigade » Mon Sep 21, 2009 8:08 am

I just soldered the last bits to the amplifier modules.

Image

I really would like to make a brake and finish one of my 829 monoblocks ...
Magnus

"It is always more difficult to fight against faith than against knowledge."
User avatar
soundbrigade
KT88
 
Posts: 1760
Joined: Mon Jan 28, 2008 4:57 am
Location: Little Paris, Sweden


Return to diy hifi

Who is online

Users browsing this forum: No registered users and 13 guests