Page 1 of 1
rectifier tubes

Posted:
Mon Jan 04, 2010 3:48 amby wazza220951
I have a few 5u4g rectifier tubes, what would be involved in modifying the circuit to use them instead of the stock item?
Posted:
Mon Jan 04, 2010 7:17 amby Ty_Bower
Welcome to diytube!
I don't have the circuit board in front of me, but I recall the GetSetGo design uses a power transformer with two 6.3 volt windings. One winding supplies the 6SL7GT and one of the 6B4G, and the other winding supplies the 6AX5GT and the other 6B4G. First, you would have to source a power transformer that had an additional 5 volt winding to supply your rectifier. You still need two separate 6.3 volt windings as well. The 6B4G output tubes cannot share the same filament winding - it's the nature of directly heated tubes.
Second, you would have to do a little cut and jumper around the rectifier socket on the circuit board. The 6AX5GT has the plates on pins 3 and 5, while the 5U4 has them on 4 and 6. You would need to jumper 3-4 and 5-6. Next, find the traces on the circuit board that connect the heater voltage to pins 2 and 7. Carefully cut away those traces on the circuit, ensuring the connection is broken. Now you need to solder the leads from your power transformer's 5 volt winding directly to pins 2 and 8 of the rectifier socket. That should be about it.
Of course, it would be a lot easier just to find a 6AX5GT rectifier. They're really not that expensive...
Posted:
Mon Jan 04, 2010 9:48 amby Ty_Bower
A short follow-up...
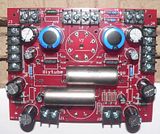
It looks like you've got easy access to the pins and traces around the rectifier. The cut and jumper shouldn't be too difficult.
It sounds as if Mike once built a GetSetGo using a 5U4 rectifier, but unfortunately his photos are gone. Maybe he can chime in and share his thoughts.
http://www.diytube.com/phpBB2/viewtopic.php?t=1603
Posted:
Mon Jan 04, 2010 2:28 pmby EWBrown
First, you will need a separate 5VAC, 3A filament trannie.
The 6AX5 uses pins 3 and 5 for the HV AC input, and pins 2 and 7 for the filament.
The 5U4G uses pins 4 and 6 for the HV AC input, and pins 2 and 8 for the filament.
Given this information, the conversion can be done relatively easily, first cut the traces from the 6.3VAC terminals to the rectifier tube's filament pins (2 and7) in order to isolate them..
Next just jumper the rectifier socket pins 3 to 4, 5 to 6, and 7 to 8. (1 and 2 could also be jumpered, but this isn't really necessary). This makes things a lot easier, as no other etch "surgery" would be required, and allows for "backward compatibility".
Connect the filament (pins 2 and 7/8) to the separate 5VAC, 3A winding, and take the B+ off pin 7/8. The AC from the HV secondary connects to pins 3/4 and 5/6
This should make it compatible with 5U4GB, 5R4, 5V4, and 5AR4, and this also allows reverting back to 6AX5 later on, simply by reconnecting the filament 2 and 7 back to the original 6.3VAC connections, AND removing the jumper between 7 and 8 (this step is VERY important)
Two separate 6.3VAC windings are still necessary for the GSG, to allow the "cathode" resistor biasing.
If you really want to "gild the lily", Edcor could make up a custom power trannie equivalent to a PA774, with an added 5VAC, 3A winding. Once they do this, it becomes a new part number on their lready extensive product listing. Think of it as "Immortality" for cheap ;-)
HTH
/ed B
Posted:
Mon Jan 04, 2010 4:17 pmby mesherm
My get*set*go used a 5U4 and a 7F7. Changing to a 5U4 wasnt to bad but the 7F7 was a pain. I eventually changed it to use EL34s and subbed in a 5AR4 for more voltage. I also robbed it of its James trannies in lieu of Edcors when James trannies went almost unobtainium.
Posted:
Tue Jan 05, 2010 8:15 amby wazza220951
Thanks Ed, Useful info. My trannie has a 5v 4 amp winding so no probs there.
I will give it a go and let you know how it sounds.
I am using James 6123hs as outputs which I got direct from them.
Posted:
Sat Jan 23, 2010 3:42 amby wazza220951
Finally got it up and running and it sounds beautiful!
Had no problem with the 5u4g conversion.
The 6C4Cs glow a beautiful blue and it really makes my TQWPs sing
WAF of 10 so must be good!
Posted:
Sun Jan 24, 2010 7:37 pmby MashBill
Congrats! Please post some pictures for us. Getting a WAF of 10 can be the hardest part of any DIY project.
Bill
