Step 1, Short the inputs. Use a couple of RCA plugs that you might have laying around. The purpose here is to be absolutely sure there is no signal getting to the amp. Some RCA plugs without cables attached will do if you solder a small length of wire to both the center and outer conductor. A cheap Rat Shack RCA pair will work fine if you cut the cable, strip both right and left, center and outer shield conductors, twist them all together, solder and tape up.
Step 2, Load the speaker outputs. Its best to use two 8 ohm, 10 watt minimum power resistors here but if you want to hook up speakers that will work also. If something goes wonky though a buck fifty resistor is a lot easier to replace. Hook up the resistors as though they were a speaker.
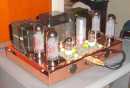
Step 3, Tilt the amplifier back and expose the circuitry inside. Most amps will rest at an angle on their trannys. Make sure the amp won't tip over though. One person has even used a table with the center leaf removed and the amp straddling the opening. Its your choice.
Step 4, Connect the black meter lead to any ground point on the amp. If your amp uses negative feedback then connect it to either speaker negative. If no other ground connection is handy then connect the black lead to the side of the resistor connected to ground. Connect the red meter lead to the side of the cathode resistor that is connected to the cathode(s).
Step 5, Set the meter to read DC volts and the closest range to 20 volts. Power up the amp and watch the meter as the tubes warm. The voltage should rise steadily. After about 3-5 minutes the amp should be warmed up enough and the reading should be holding steady. Write down the reading. If you have multiple cathode resistors then disconnect the red lead and move it to the cathode side of the next cathode resistor and record the voltage.
Step 6, Divide the voltage in volts by the cathode resistor value in ohms. This will give you the current through the resistor in amps. If all four tubes are connected to the resistor then divide the current by four to find the single tube current. Unless the tubes are well matched however there is no guarantee that all tubes are conducting equal current.
If two tubes are connected, then divide by two.
Step 7, Switch power off and disconnect all leads.
Need advice on SCA 35 cathode resistor
27 posts
• Page 2 of 2 • 1, 2
![]() by dhuebert » Fri May 25, 2007 7:20 am
by dhuebert » Fri May 25, 2007 7:20 am
In several posts lately it has come to my attention that V=IR is poorly understood. Also P=IV.
For this application, if power is to be kept the same for a higher speaker impedance the voltage has to go up. Substituting, P= V*V/R or V=\/PR so for say 10 watts at 8 ohms V=8.94 volts for 10 watts at 16 ohms V=12.65 volts. This is an oversimplication but illustrates the point.
Prof Julius Sumner Miller.
Is it because the transformer output is higher for the 16ohm speaker connections?
For this application, if power is to be kept the same for a higher speaker impedance the voltage has to go up. Substituting, P= V*V/R or V=\/PR so for say 10 watts at 8 ohms V=8.94 volts for 10 watts at 16 ohms V=12.65 volts. This is an oversimplication but illustrates the point.
Prof Julius Sumner Miller.
-

dhuebert - KT88
- Posts: 820
- Joined: Thu May 01, 2003 9:26 am
- Location: Winnipeg Manitoba Canada
![]() by EWBrown » Fri May 25, 2007 7:47 am
by EWBrown » Fri May 25, 2007 7:47 am
The audio signal at the 16 ohms connection will be sqrt 2 or 1.414 times the signal voltage level at 8 ohms. This also equates to 3 dB.
On the DIY35 board, the NFB resistor is a 50K trimpot, normally set to 27K for 16 ohms, or 19K for 8 ohms. That, in turn, feeds to the cathode of the input VA tube, which has a 1.3K resistor to ground.
Increasing the trimpot NFB resistance will decrease the amount of NFB, conversely, decreasing the resistance will increase it. I usually take the lazy way out and just set it to the "default" value...
/ed b in NH
Real Radios Glow in the Dark
-

EWBrown - Insulator & Iron Magnate
- Posts: 6389
- Joined: Wed Mar 19, 2003 6:03 am
- Location: Now located in Clay County, NC !
![]() by K-MAN » Sat May 26, 2007 9:23 pm
by K-MAN » Sat May 26, 2007 9:23 pm
Well I replaced the cathode resistor with a 100ohm and replaced some other critical resistors and I fired it up today to see how it sounds before I do anything else and all I can say is wow. I seem to have a much more warm sound with more bass it seems. Thanks for the advice again.
-

K-MAN - Posts: 160
- Joined: Thu Nov 30, 2006 5:12 am
![]() by Shannon Parks » Sun May 27, 2007 6:13 am
by Shannon Parks » Sun May 27, 2007 6:13 am
K-MAN,
Awesome!
Did you change the feedback, too? What is your measured voltage at that 100 ohm resistor, if I might ask?
Awesome!
Did you change the feedback, too? What is your measured voltage at that 100 ohm resistor, if I might ask?
- designer of fine tube audio gear at (((parks audio)))
- founder and admin of the diytube forums
-

Shannon Parks - Site Admin
- Posts: 3764
- Joined: Tue Mar 18, 2003 5:40 pm
- Location: Poulsbo, Washington
![]() by K-MAN » Thu May 31, 2007 3:41 am
by K-MAN » Thu May 31, 2007 3:41 am
Ok well I took the voltage across the new cathode resistor and it's 13.65VDC, so thats 34 mA per tube which sounds just right :) BTW this amp has the original filter caps but they look to be in good shape and theres no hum at all in the audio so does that mean they should be alright? I don't know of any reliable and simple way to test them besides listening for hum and checking for shorts so I've just kept them as is.
-
K-MAN - Posts: 160
- Joined: Thu Nov 30, 2006 5:12 am
![]() by EWBrown » Thu May 31, 2007 5:06 am
by EWBrown » Thu May 31, 2007 5:06 am
The voltage seems to be right on, and if there isn't any hum, then there is no need to replace the caps. If they were dried out or otherwise gone bad, there would be no doubt... :o
Enjoy that great tube sound!
/ed B in NH
Enjoy that great tube sound!
/ed B in NH
Real Radios Glow in the Dark
-
EWBrown - Insulator & Iron Magnate
- Posts: 6389
- Joined: Wed Mar 19, 2003 6:03 am
- Location: Now located in Clay County, NC !
![]() by K-MAN » Wed Jun 13, 2007 2:35 pm
by K-MAN » Wed Jun 13, 2007 2:35 pm
One last thing I was wondering is how can I measure the max power output of my amp? I'd like to see if this change of resistor has increased my power much. Also what's the difference in power output between the ST-35 and the SCA-35. It would seem the more powerful 7199 would boost the output a bit.
-
K-MAN - Posts: 160
- Joined: Thu Nov 30, 2006 5:12 am
![]() by erichayes » Wed Jun 13, 2007 3:54 pm
by erichayes » Wed Jun 13, 2007 3:54 pm
You're getting gain confused with output power, which is not uncommon. Maximum output power is determined by the output tube(s), output transformer, B+, total cathode current and signal voltage on the grid(s). If the first four parameters are held constant (let's assume we're dealing with a class A amplifier here), then the sole determining factor of output power would be the signal on the grid--which would in turn be determined by the gain structure of the previous stages.
With the SCA-35, a 7199 was used to make up for all the signal loss created by the tone control circuitry--somewhere around 30~40 dB if I recall correctly. If you removed the tone controls, you'd find that you'd only need to turn the volume control up slightly to make things real loud. But because those first four parameters are the same in the SCA-35 as they are in the ST-35, the output power will be virtually the same if the ST-35 is driven with an adequate signal.
To answer your question, you need a couple of 8Ω 20W (absolute minimum) resistors, a sine wave generator capable of putting out 1000~ at up to 1 volt minimum, a decent AC voltmeter, and an oscilloscope.
Hook the resistors up to the 8Ω speaker terminals and ground, and the generator to the input jacks of the amp. Turn the generator output to zero, turn it on and let it warm up a little. Hook the voltmeter up across one of the resistors; do the same with the 'scope. Set the meter to the 20 volt scale, and the 'scope to 5V/div. Locate the trace on the 'scope screen and center it using the position controls. If the 'scope has triggered sweep, set the trigger level for a stable trace--you might have to give the amp a little signal to do this.
Turn the output control up until you see vertical deflection of the trace. Now adjust the timebase control until you have one complete waveform on the screen. Advance the control until the top of the waveform just starts showing some deformation. By now you'll probably hear your output transformers ''singing''. This is normal. Take a reading on the voltmeter and repeat for the other channel.
Take the voltmeter readings, square them, divide the products by 8, and you'll have your output power at roughly 1% THD.
Eric in the Jefferson State
- erichayes
- KT88
- Posts: 987
- Joined: Fri Jan 23, 2004 9:01 pm
- Location: McKinleyville CA
Left field
![]() by dhuebert » Thu Jun 14, 2007 8:27 am
by dhuebert » Thu Jun 14, 2007 8:27 am
I'm going to start calling my posts "left field" cause I always seem to have a different approach. Everything Eric says is all right and the way I do it too, But... Gar Gillies had an interesting technique that I quite liked. He had a VTVM with an RMS scale on it. He would hook it up across the resistor and turn up the volume watching the needle on the scale. When the needle reversed its course and the voltage reading would start to drop he would take the maximum as his value and calculate power from there. Because these meters were not true RMS but only calibrated for a sine wave they could be used as a guestimate distortion meter. And because of the way tube amps distort, his power readings were always higher than I got with the method Eric describes. Which is good for selling guitar amps.
Don
Don
-
dhuebert - KT88
- Posts: 820
- Joined: Thu May 01, 2003 9:26 am
- Location: Winnipeg Manitoba Canada
27 posts
• Page 2 of 2 • 1, 2
Who is online
Users browsing this forum: No registered users and 62 guests